This year, we built a very special place for LEGO building right outside of our library. It's our NEW LEGO Wall!
We took over a bulletin board and transformed it into this great place for our students to be creative, collaborate and show off what they are making with LEGO's this year.Let me show you how we built our LEGO Wall, storage and gallery.
One day when I was at the Dollar Tree, I found plates that will work with LEGO's. They are called Make-It-Blocks and you can learn more here. I bought brown, green, blue and grey. I like how these colors will be good for grass, dirt, sky and more.
One of my library partners, Brittany Marks, put up the plates with command strips.
I then went home to brainstorm with my husband, Eric, about what we could use for a storage place at the bottom of the LEGO Wall. We thought it would be cool to use a metal gutter.
Eric and I went to Home Depot and bought a long piece of gutter.
Eric trimmed it down to 72 inches, the width of the LEGO Wall.
He glued gutter end caps on each end so it wouldn't be sharp. At the top of the LEGO Wall, I wanted to create a place for us to show off what our students were creating. Since all of our students at Van Meter are creating on the wall, it will be nice to take pictures as they create, just in case their creations are taken down by others. We will call this our LEGO Gallery!
At Home Depot, we also picked up a roll of Galvanized Flashing.
We unrolled it and measured 72 inches for the top of the board.
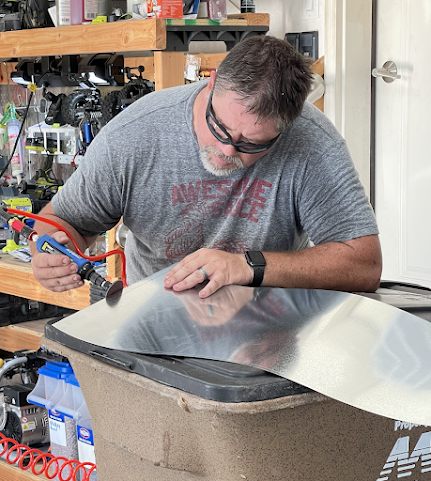
Eric used a die grinder to deburr the edges and...
...and a rubber mallet to smooth it all out.
We took it all to school and installed the flashing and gutter. I created a sign that says Check out the LEGO Creations by our awesome Van Meter students and...
....put the printed poster into a black frame on the LEGO Wall. We love how our new LEGO Wall turned out and can't wait to fill it with kids and creations this year.


No comments:
Post a Comment