

As we get ready for a new school year, we are dreaming up amazing ways to kick off the year with our students.
At my school, we are excited to kick off our new school year with a very special project to celebrate each students uniqueness and creativity.

We are going to create Class Pixel Art Portrait Murals to hang in our classrooms!

Each student will create their self portrait using the StickTogether Pixel Art Canvas. It is free for everyone.
They will do this on the first day of school. This activity can even be done with their family before they come to school.
Let me show you how to do this with your students too!

1. First, they will create their portrait in the StickTogether Pixel Art Canvas.

They will go to the StickTogether Pixel Art Canvas found here. This link can easily be shared with the students on their device. We use Google Classroom to share links.

For our littles using iPads, I use this choice board. They can scan the QR code or type in the bit.ly at the bottom.

Instruct your students to put their First Name and Last Name Initial.

2. Have students create their self portrait in the Pixel Art Canvas.

SUPER IMPORTANT... If you want to create a mural, you might want to have students use the same format, either vertical or horizontal. I find that the vertical format gives them the best layout for a self portrait.
I talk to the students about making the background interesting too. It's amazing what they create.

3. Once they have finished their pixel art portrait, have each student click Generate PDF's.
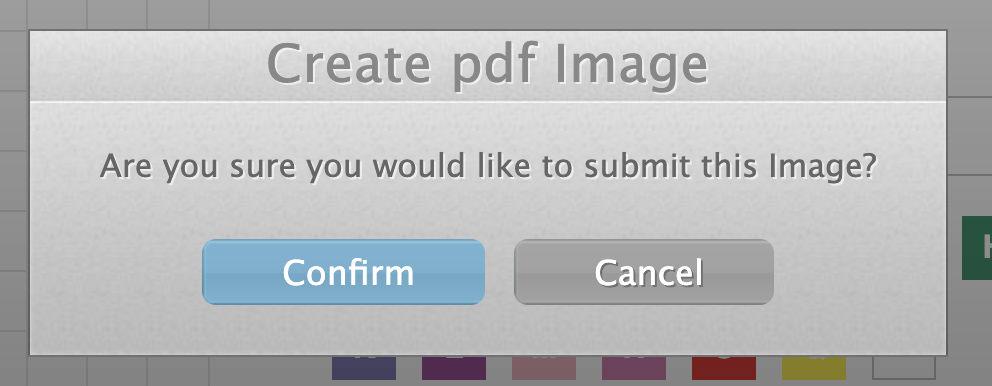
This box pops up and they click on Confirm, which downloads two files onto their Chromebook.

One is the pixel art in full color and the other...
...is the pixel art worksheet they fill in with the stickers.
4. To make it easy to get these files from each student from their Chromebook, I created a Padlet and shared the link with them in their Google Classroom.

Each student shared their two pixel art files to the Padlet.

When they download from the Pixel Art site, their name is added to each file. This makes it really easy to identify the art on the Padlet and when they are printed off. The name is at the bottom as you can see in the image above.
And guess what? Coming very soon, there will be a MUCH simpler solution for saving both the art work and the coded worksheet directly to the teacher's dashboard. Stay tuned for this. I can't wait!
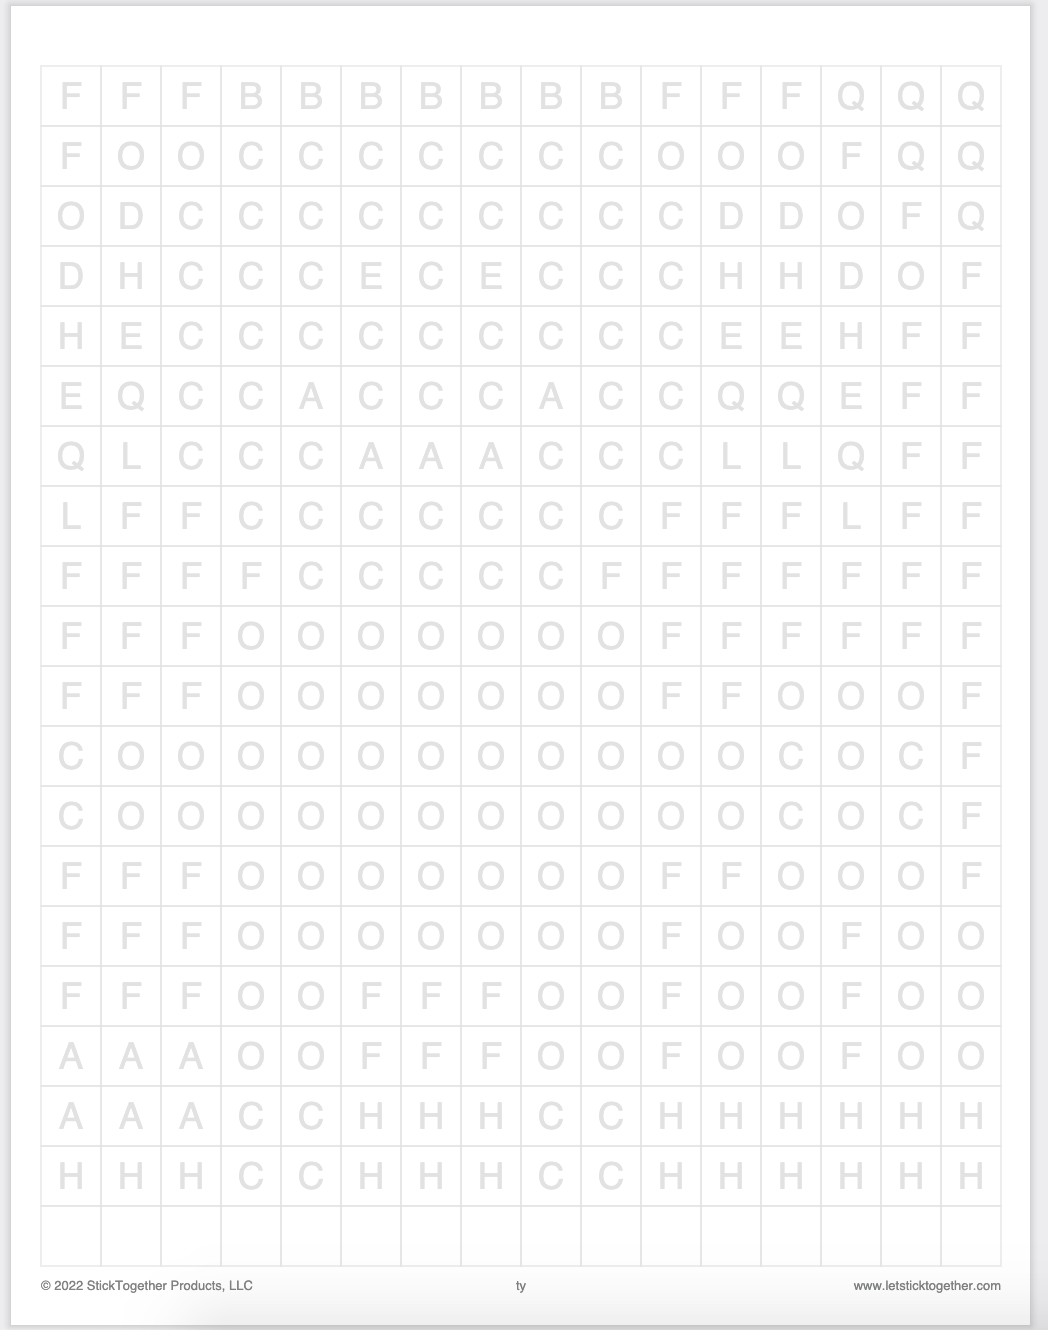
5. Once you have gathered all of the portraits on the Padlet, print out each students coded worksheet.

6. Now, it's time for them to "sticker" their portraits!
You can set up a sticker station using leftover stickers from kits using the StickTogether Color Key.
Each code (letter) on the worksheet is tied to the StickTogether Color Key.

You can also buy the Pixel Art Class Pack. This amazing pack gives you 10 pages of each colored stickers. Each page contains 221 stickers.

7. They will fill up their worksheet to create their Pixel Art Portrait.
When our students did this project last year, they all loved how they turned out!

8. Once everyone is done, you can put them together within your classroom, or in the hallway outside of your classroom, to create your class Pixel Art Portrait Mural.
I can't wait to see all of the beautiful portraits throughout our school.

Both creating the image, and "stickering" the worksheet are special ways to kick off the year with your new students as you celebrate individually and build community in the classroom and throughout the school.
And that is something wonderful to celebrate with your students all year long!
No comments:
Post a Comment