Our 5th graders in Lorie Prouty's classroom have an amazing technology project to share with you.
When Lorie reached out to me to collaborate on a cool technology project, I thought it would be awesome to tie in the work we did earlier this fall with...
...creating their own paper Merge Cube and using Merge Explorer to learn about different science topics.
You can read more about how to do this in this post.
The paper Merge Cube pattern is there in the post too.
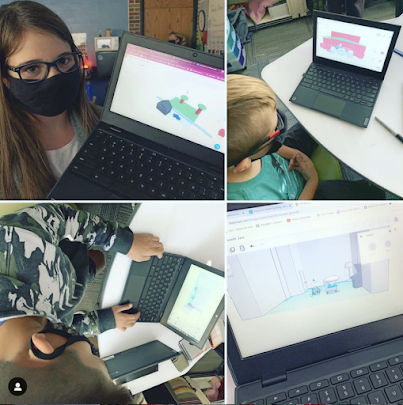
Lorie's students had just written personal narratives so we decided to have them recreate the setting using Tinkercad, a free online 3D design program.
With Tinkercad, students can design, and even code, all kinds of 3D designs to either print on a 3D printer or download to use with other digital tools and apps. As a teacher, you just click on the Teach tab at the top to find all kinds of teaching materials including how to set up your first class.
Once you have your class set up, you will get a class code that you share with your students.
When your students go to Tinkercad for the first time, they will get this screen that allows them to put in that class code. They can also go to the left hand sidebar, find Join Class and...
...add the code.
Our students logged in with their school Google account and it was so easy for them to get connected to the 5th grade Tinkercad Class.
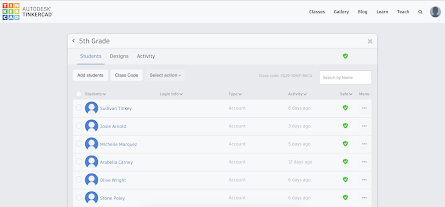
Once the students are part of your class, you can see all of the students, along with the 3D designs they create.
To get your students started, have them click on the Learn tab to work through the beginning tutorials. These are interactive and fun for the students to learn how to use Tinkercad and work with 3D printing. Now they are ready to start creating in Tinkercad!
They have lots of options including shapes, scribbles (drawing),...and tons of other objects. They can even upload their own drawings or patterns they find in Thingiverse.
The sky is the limit on what they create in Tinkercad.
They brought the settings in their personal narratives to life!
We were so impressed with the creativity and detail they put into their Tinkercad 3D designs. These three even figured out how to collaborate in the same Tinkercad space by....
...sharing the Collaborate link to the 3D design.
They loved working together and couldn't wait for the next step in the project.
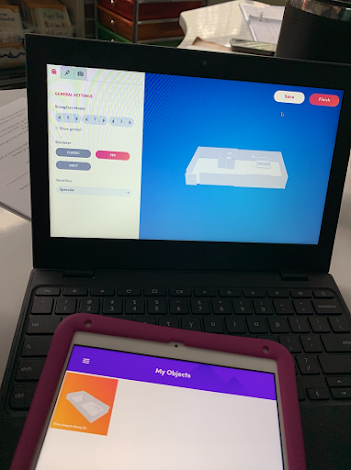
After they finished their 3D designs, we took their work, downloaded as a STL file and uploaded the saved 3D print file into Merge Object Viewer.
When you go to Merge Object Viewer, you will find upload in the right hand corner. Just click on Upload,
When you go to Merge Object Viewer, you will find upload in the right hand corner. Just click on Upload,
and find the STL file.
It will upload where you can then make...
...changes and even take a thumbnail picture to save and share.
Once they have their 3D design upload,
they log into the MergeEDU Object Viewer app with their account and they will find the 3D designs they have uploaded under My Objects.
They click on the 3D design they want to view, open up the camera and scan their paper Merge Cube to view their Tinkercad design in 3D.
They loved seeing their creations in 3D.
They enjoyed sharing their work with classmates too. We had the students add a picture and link to their Tinkercad 3D design to a Padlet so they could get a closer look.
Using Padlet to bring projects together is a handy way to share with students and families. And even for grading.
This project is one of the best ways to introduce 3D printing. In December, this group will be creating holiday ornaments in Tinkercad, viewing them in Merge Object Viewer and printing on our 3D printers.
We can't wait to see what they continue to do around 3D printing and blended learning throughout the year!


No comments:
Post a Comment